
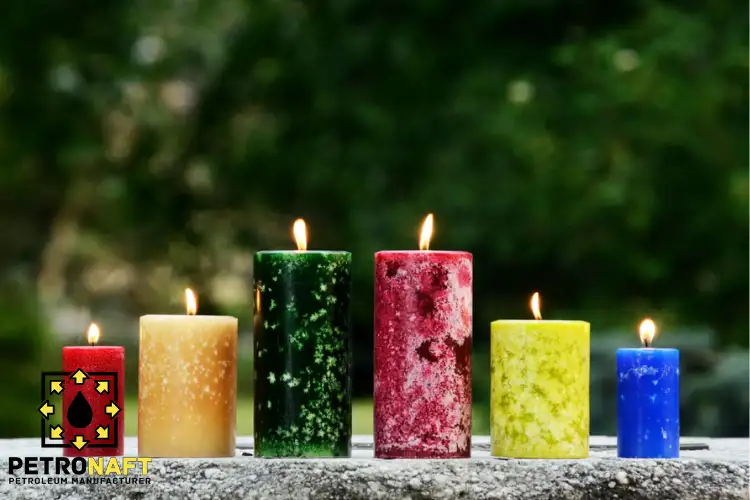
ArtMinds Paraffin Wax is a practical, high-performance wax for everyday candle making because it melts predictably, accepts dye and fragrance well, and can be blended to tune hardness and burn. If you want strong scent throw, smooth tops, and reliable results without expensive specialty waxes, it’s a smart place to start.
Highlights & Key Sections
What you’ll get from this guide
- When this wax makes sense (and when it doesn’t)
- How to choose a wick and fragrance load without guesswork
- Two mini tutorials: containers and wax melts
- A troubleshooting map for the most common candle problems
- A buyer-focused checklist so you can purchase and use it confidently
ArtMinds Paraffin Wax: What it is and who it’s for
Paraffin wax is a refined petroleum-based wax known for clean molding, glossy finishes, and excellent fragrance “throw” (how well scent travels). ArtMinds Paraffin Wax is typically positioned for crafters who want dependable performance for hobby and small-batch candle projects.
It’s a good fit if you:
- Want stronger scent throw than many beginner soy setups
- Prefer a smoother, glossier finish on tops and melts
- Need a wax that dyes easily and looks vibrant
- Make gifts, seasonal batches, or small runs with consistent repeatability
It may not be ideal if you:
- Need an ultra-high “natural wax” label claim (market preference varies)
- Want a single wax that excels equally at containers and hard pillars without adjusting anything
- Are very sensitive to soot risk and don’t want to experiment with wicks (paraffin can run clean, but wick choice matters)
Uses that actually make sense (beyond the obvious)
Most people buy paraffin for candles—but it can do more when you’re trying to get value from one material.
Best uses
- Container candles: Smooth tops, strong scent throw, easy color
- Wax melts/tarts: Bright color + punchy scent release
- Blends: Mix with soy/coconut waxes to improve throw and appearance
- Craft sealing & coatings: Light-duty protective wax layer for some projects (test first)
Not the best uses
- Food-contact coatings (unless explicitly food-grade and labeled as such)
- Any application requiring certified industrial specifications (unless you have documentation)
Benefits that buyers and pros care about
Paraffin isn’t “better” than other waxes—its strengths are simply different. Here’s why experienced makers still use it.
1) Strong fragrance performance
Paraffin often delivers:
- Faster scent release (hot throw)
- Better room fill at moderate fragrance levels
- More consistent performance in wax melts
2) Cleaner aesthetics with less fuss
When your pour temperature and cooling are controlled, you can get:
- Smoother tops
- More vibrant dyes
- Less frosting (common in some vegetable waxes)
3) Easier to “tune” for the job
Paraffin blends well. You can:
- Add a small percentage of softer wax for better container adhesion
- Add a harder wax or additive for firmer melts and pillars
Quick comparison table: paraffin vs common alternatives
Use this table to decide based on outcomes (what buyers notice), not ideology.
| Wax type | What it’s best at | Typical drawbacks | Who should choose it |
|---|---|---|---|
| Paraffin | Strong scent throw, glossy look, vibrant color | Wick choice is critical for clean burn; can shrink/pull away in some containers | Gift makers, melt sellers, anyone optimizing scent |
| Soy | “Plant-based” positioning, good containers | Frosting, softer melts, sometimes weaker hot throw without tuning | Branding around plant-based, slower burn preference |
| Coconut blends | Creamy appearance, strong throw in many blends | Higher cost; can be softer | Premium containers where budget allows |
| Beeswax | Naturally aromatic, long burn, firm pillars | Expensive; scent blending can be tricky | Natural aesthetic, unscented or lightly scented pillars |
The #1 performance lever: wick selection (simple rules)
Most candle issues blamed on “bad wax” are actually wick problems.
Start with these practical principles
- Too small wick: tunneling, weak hot throw, drowning flame
- Too large wick: soot, smoking, overheating container, harsh smell
Wick choice depends on
- Jar diameter
- Fragrance type and load
- Dye amount
- Additives/blends
- Burn time goals (short ambience vs long steady burn)
Mini-wick testing plan (fast and realistic)
Do this once, then reuse the “recipe”:
- Pick 2–3 wick sizes for your jar diameter.
- Make three test candles with the same wax weight, fragrance %, and pour conditions.
- Burn each for 3–4 hours, trim wick, and repeat next day.
- Choose the wick that gives:
- Steady flame (not roaring)
- Minimal soot
- Full melt pool near the jar wall by the end of the burn window
- Comfortable jar temperature (warm, not dangerously hot)
Fragrance and dye: how to avoid wasted batches
Fragrance load guidelines (practical, not spammy)
A safe, common working approach:
- Start around 6% by weight for many candle fragrances
- Test up to the wax/fragrance limit stated by your fragrance supplier
- Increase only if performance needs it—more isn’t always better
Why “more” can fail
- Overloading can cause sweating, poor burn, or smoky behavior
- Some fragrances are “wick killers” and need a wick adjustment, not more oil
Dye tips that prevent clogging and soot
- Use candle dyes made for wax (liquid or solid)
- Keep color loads modest during wick testing
- If soot increases after dyeing, test one wick size smaller (or reduce dye)
Mini tutorial #1: a reliable container candle workflow
This is a repeatable method you can scale from 1 candle to 50 with consistent results.
Equipment checklist
- Heat-safe pouring pot
- Thermometer (critical)
- Scale (grams preferred)
- Stir tool
- Wick stickers or hot glue
- Centering tool
- Clean jars
Step-by-step process
- Measure by weight
- Weigh wax for your jar volume.
- Calculate fragrance:
- Example: 500 g wax × 6% = 30 g fragrance.
- Melt gently
- Heat until fully melted and clear.
- Avoid overheating “just because.” Excess heat can increase discoloration and scent loss.
- Add fragrance at a stable mixing temperature
- Let the wax cool slightly before adding fragrance.
- Stir slow and steady for ~2 minutes to bind fragrance evenly (avoid whipping air).
- Pour and cool with control
- Pour smoothly.
- Cool away from drafts.
- If you get surface imperfections, you can do a small top-off pour or a brief heat-gun pass (minimal heat).
- Cure before judging
- Many scented candles improve after a few days of cure (varies by fragrance and wax behavior).
- Test burn only after the candle has set and stabilized.
Common “first batch” targets
- Smooth top
- No seepage/sweating
- Stable flame
- Good scent at 2–3 hours into the burn
Mini tutorial #2: wax melts with strong scent and clean release
Wax melts are where paraffin often shines.
Simple melt process
- Melt wax completely.
- Add fragrance and stir gently.
- Pour into clamshell molds or silicone trays.
- Cool fully before unmolding.
Pro tips
- Keep your pour area level to prevent uneven tops.
- If melts crumble, your blend may be too hard (or you cooled too quickly).
- If melts feel greasy, reduce fragrance or confirm compatibility.
Troubleshooting table: fix the problem without guessing
When a batch fails, change one variable at a time. This table helps you choose the right variable.
| Problem | Most likely cause | Fast fix |
|---|---|---|
| Tunneling | Wick too small; too much fragrance; short burn cycles | Increase wick size; reduce fragrance; enforce 2–4 hour burns |
| Soot/smoke | Wick too large; drafts; high dye load; dirty jar rim | Try smaller wick; trim to ~5 mm; reduce dye; keep jar clean |
| Sinkholes | Cooling too fast; pour temp mismatch | Pour slightly warmer; insulate; do a second pour/top-off |
| Wet spots/pull-away | Normal shrinkage; jar temp swings; adhesion limits | Pre-warm jars; cool slowly; consider a small blend change |
| Weak hot throw | Wick too small; fragrance not suited; not cured | Increase wick size; test a different fragrance; allow cure time |
| Rough tops | Drafts; pour/cool too cold | Pour a bit warmer; cool in still air; quick surface heat pass |
Safety and quality habits that build trust (and reduce returns)
If you sell candles or give them as gifts, your process needs consistency.
Core safety practices
- Use a thermometer and avoid overheating wax.
- Never leave melting wax unattended.
- Keep water away from hot wax.
- Use heat-safe containers rated for candle use.
- Test burn every new fragrance and jar size combination.
Quality habits buyers notice
- Consistent scent level between batches
- Same burn time expectations across the line
- Clean tops and labels
- Clear burn instructions (trim wick, burn time windows)
Trend watch: why paraffin is still relevant in 2026-style candle markets
Two market pressures are shaping modern candle content and purchasing behavior:
- Performance-first buying: Many shoppers want “strong scent” and “clean burn” more than they want a specific wax label. That pushes makers toward paraffin or paraffin blends because they often deliver room-filling scent with fewer tweaks.
- Cleaner-burning expectations: Customers increasingly complain about soot and headaches. This makes wick testing, proper fragrance load, and burn instructions part of your product quality—not optional extras.
Buying guidance: what to look for before you add to cart
When comparing options, focus on product clarity and repeatability.
Check for
- Form factor: blocks, slabs, pellets (impacts melting convenience)
- Recommended use: containers vs pillars vs blends
- Melt behavior guidance on the label or packaging
- Consistent batch availability if you plan to scale
If you plan to sell
- Buy enough from the same batch/lot for your initial product run.
- Lock a repeatable recipe: jar + wick + fragrance % + pour method.
Conclusion
If you want a wax that delivers strong scent throw, vibrant color, and repeatable results with a professional finish, ArtMinds Paraffin Wax is a solid choice—especially for container candles and wax melts. The key is disciplined wick testing, sensible fragrance load, and controlled cooling. Do those three things, and you’ll get candles that look better, perform better, and earn trust faster.
Executive Summary checklist (save this)
Before you pour
- Choose the jar and measure wax by weight
- Pick 2–3 wick sizes to test (don’t guess one)
- Decide a starting fragrance load (often ~6% by weight)
During making
- Melt fully, avoid overheating
- Add fragrance at a stable mixing temperature
- Stir gently ~2 minutes (no air whipping)
- Pour in a draft-free space and cool slowly
Before you judge results
- Allow cure time (at least a few days is a practical baseline)
- Burn test 3–4 hours per cycle, trim wick between burns
- Log results and change one variable at a time
FAQ
1) Is paraffin wax safe for candles?
When you make and burn candles correctly—proper wick size, fragrance load, and burn instructions—paraffin candles can burn cleanly. Most safety issues come from oversized wicks, drafts, or excessive additives that increase soot.
2) How much fragrance should I use with paraffin wax?
A practical starting point is around 6% by weight, then adjust through testing. Too much fragrance can cause sweating, poor burn, or smoke—so increase only if the candle performs cleanly.
3) Why is my candle sooting even though the wax looks fine?
Soot usually points to a wick that’s too large, poor airflow (drafts), or heavy dye/fragrance loads. Try a smaller wick, keep the burn area draft-free, and trim the wick before each burn.
4) Can I blend paraffin with soy or coconut wax?
Yes—blending is common to improve adhesion, appearance, or burn profile. Treat every blend like a new product: re-test wick size, fragrance performance, and cure behavior.
5) Why do I see wet spots or pull-away from the jar?
Paraffin can shrink as it cools, and glass temperature swings make it more visible. Pre-warming jars, cooling slowly, and using consistent room temperatures reduces it—but some wet spotting can still happen and doesn’t always affect performance.
Sources
- Industry safety guidance and best practices for candle making and burning from the National Candle Association: National Candle Association – Candle Safety
- Standards and terminology that inform product testing and consumer safety expectations from ASTM International: ASTM International
- Consumer product safety information and general risk awareness relevant to home products from the U.S. Consumer Product Safety Commission: CPSC
- Occupational exposure and indoor air guidance that helps contextualize ventilation and particulate concerns from NIOSH: NIOSH