
This Asphalt Emulsion Sealer Guide shows how a water-based emulsion sealcoat can protect asphalt from oxidation, water intrusion, and surface wear—when applied correctly. For most driveways and light-to-medium parking areas, two thin coats over a clean, repaired surface can improve appearance and slow aging, typically extending reseal intervals to about 2–4 years.
If you only remember three things:
- Prep is the job. Most failures come from dirt, dust, oil, or loose material—not the sealer.
- Two thin coats beat one thick coat. Thick sealer stays soft, tracks, and peels.
- Sealcoat preserves; it doesn’t rebuild. Fix cracks, potholes, drainage, and base issues first.
Highlights & Key Sections
Asphalt Emulsion Sealer Guide: What It Is and When to Use It
Asphalt emulsion sealer (often called “asphalt emulsion sealcoat”) is a water-based coating made from asphalt binder dispersed in water with stabilizers and mineral fillers. When water evaporates, it leaves a protective film that helps:
- Reduce oxidation (sun + air drying out the binder)
- Slow water penetration through surface texture and micro-cracks
- Improve appearance (restores a dark, uniform finish)
- Add sacrificial wear on the surface (instead of the asphalt wearing directly)
The best candidates (and the worst)
Sealcoat works best on structurally sound pavement with surface aging—think “gray and thirsty,” not “falling apart.”
| Pavement condition you see | What it usually means | Best next step |
|---|---|---|
| Light gray color, minor hairline cracks | Surface oxidation | Clean + crack seal + emulsion sealcoat |
| Fine raveling (sand-like grains coming loose) | Early binder loss | Consider sealcoat (often with added sand for traction) |
| Several cracks but pavement still solid | Water is trying to enter | Crack repair first, then sealcoat |
| Alligator cracking, pumping, soft spots | Base/subgrade failure | Structural repair/overlay—not sealcoat |
| Standing water after rain | Drainage/slope issue | Regrade/patch for drainage, then seal later |
| Oil leaks and shiny dark spots | Contamination prevents bonding | Degrease or replace/patch those areas |
Uses and Benefits That Matter in Real Life
Where asphalt emulsion sealer shines
- Residential driveways: Better curb appeal + slower weathering
- Commercial parking areas: Preserves surface and supports line-striping programs
- Low-speed access roads: Helps extend maintenance cycles when the base is healthy
What you actually “gain” (practical benefits)
- Cleaner surface: Less dusting and raveling over time on sound pavements
- Easier maintenance: Treated lots are easier to sweep, wash, and stripe
- Lower long-term cost: You reduce the odds of early overlays by delaying surface aging
Field insight: If your surface is dry, porous, and oxidized, it “drinks” sealer. That’s normal. Your job is to apply enough to protect—without laying it on so thick that it never hardens properly.
Asphalt Emulsion vs Other Sealers: What to Choose (and Why)
People often compare emulsion to coal-tar and acrylic/polymer options. Here’s the decision in plain language:
| Option | Best for | Strengths | Trade-offs |
|---|---|---|---|
| Asphalt emulsion sealer | Most driveways & lots | Water-based, asphalt-compatible, good appearance | Needs dry weather; quality varies by formula |
| Coal-tar based sealer | High stain resistance | Strong chemical resistance | Environmental concerns in many regions; odor; can be restricted |
| Acrylic / polymer coatings | Specialized surfaces | Fast dry; consistent film | Often pricier; may be less “asphalt-like” in look/feel |
| Rejuvenators (penetrating) | Oxidized but intact asphalt | Restores binder flexibility (penetrates) | Not a “black paint” look; performance depends on pavement condition |
Trend watch (for buyers and contractors):
- More specs and professional products emphasize water-based, low-PAH formulations and polymer-modified emulsions designed for faster cure and better durability.
- Property managers increasingly align sealcoating with asset-management schedules (condition scoring + planned maintenance) instead of waiting for visible failure.
Before You Buy: What to Look for on a Spec Sheet
Not all emulsions behave the same. If you want fewer callbacks, fewer DIY do-overs, and better durability, check these:
Product quality signals (quick checklist)
- Standard compliance: Look for products marketed to meet recognized pavement-sealer specifications (common in professional grades).
- Solids/non-volatiles: Higher solids typically means more protective film per coat (within reason).
- Polymer modification: Often improves adhesion, wear, and water resistance.
- Aggregate/filler compatibility: Many professional mixes include graded sand for traction and durability.
- Mixing and dilution guidance: Clear instructions usually indicate a controlled formulation.
DIY vs Contractor-grade: a realistic comparison
| Factor | DIY pails (retail) | Contractor-grade (professional supply) |
|---|---|---|
| Consistency | More variable | More predictable batch-to-batch |
| Coverage | Often lower if too thick | Designed for calibrated application |
| Durability | Good if applied perfectly | Better odds in real-world conditions |
| Best user | Small driveway projects | Large areas, parking lots, repeat programs |
Mini Tutorial: Calculate How Much Sealer You Need (Without Guessing)
Two common ways products express coverage:
- Square feet per gallon per coat (easy for DIY)
- Gallons per square yard (common in specs and pro estimating)
Typical real-world planning range:
- About 80–120 sq ft per gallon per coat on average pavement
- Highly porous surfaces may drop to 50–80 sq ft/gal
- Very tight, smooth surfaces may stretch to 120–150 sq ft/gal
Quick estimator table (two coats)
Assume 100 sq ft/gal/coat as a planning baseline.
| Area (sq ft) | Gallons per coat | Total gallons (2 coats) | Practical buy recommendation |
|---|---|---|---|
| 400 | 4 | 8 | Buy ~10 (waste + texture) |
| 600 | 6 | 12 | Buy ~15 |
| 1,000 | 10 | 20 | Buy ~25 |
| 5,000 | 50 | 100 | Plan bulk + calibrated spray/squeegee |
Real example (600 sq ft driveway):
- Coat 1: ~6 gallons
- Coat 2: ~6 gallons
- Add 20–30% for texture edges, porosity, and cleanup losses → ~15 gallons total is a safe plan.
Step-by-Step Application: The Pro Method That Prevents Peeling
Most “bad sealcoat” photos come from skipping prep or applying too thick. This workflow avoids both.
Step 1: Pick the right day (weather rules)
Aim for:
- Dry forecast (no rain) for at least a day
- Warm temperatures (commonly 10°C/50°F and rising)
- Low humidity and good airflow for faster curing
- Avoid windy days if you’re spraying (overspray + uneven film)
Step 2: Surface preparation (the part that actually matters)
Do these in order:
- Remove weeds/grass at edges and cracks
- Sweep hard, then blow dust from texture
- Wash if needed (let it dry fully)
- Degrease oil spots (oil is a bond killer)
- Remove loose and flaking material—sealcoat won’t glue it back down
Pro tip: After cleaning, drag a clean shoe across the surface. If you raise dust, you’re not ready.
Step 3: Repair first (sealcoat is not crack filler)
- Fill cracks: Use a dedicated crack sealant. Large cracks and joints need proper crack repair, not extra sealcoat.
- Patch potholes and failed areas: Patch and compact; let repairs cure.
- Fix drainage: If water ponds, it will shorten the life of any coating.
Step 4: Mix correctly (avoid weak film)
- Stir to uniform consistency (especially if fillers settle).
- Follow dilution and additive limits.
Common failure: Over-watering to “make it spread” → thin, weak film that wears fast.
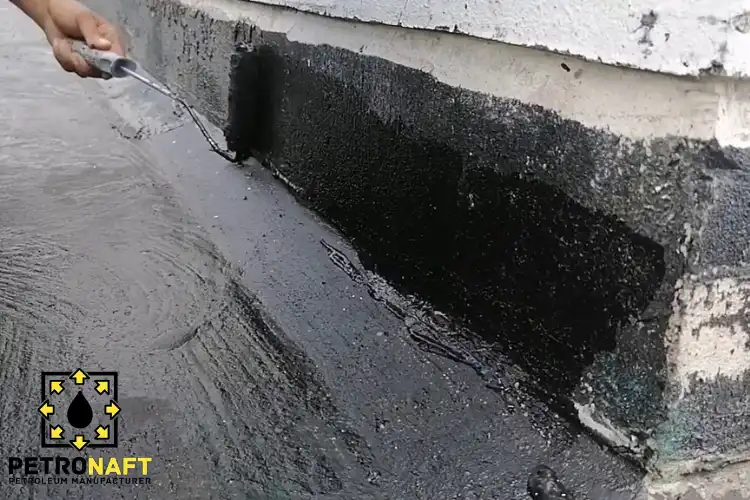
Step 5: Apply in two thin coats
Use one of these approaches:
- Squeegee + brush edges: Great control, fewer streaks.
- Spray + squeegee back-brush: Fast and uniform on larger areas.
Application best practices:
- Keep a wet edge; don’t stop mid-lane.
- Apply thin—you should still see faint texture after coat 1.
- Let coat 1 dry fully before coat 2.
Step 6: Protect it while it cures
- Block off traffic early.
- Prevent sprinklers from hitting the surface.
- Keep pets off (paw prints are forever).
Drying and Curing: When Can You Walk or Drive on It?
Drying depends on temperature, humidity, wind, film thickness, and pavement porosity.
| Condition | Walk-on (light foot traffic) | Drive-on (cars) | Full cure / hardening |
|---|---|---|---|
| Warm, dry, breezy | ~3–6 hours | ~12–24 hours | ~24–48+ hours |
| Mild temps, average humidity | ~6–12 hours | ~24–48 hours | ~2–3 days |
| Cool nights / high humidity | 12+ hours | 48+ hours | 3+ days |
Rule that prevents 80% of problems:
If the film still feels soft or “rubbery,” wait. Early traffic causes tracking, scuffs, and premature wear.
Common Problems (and How to Fix Them)
| Problem | What caused it | Fix now | Prevent next time |
|---|---|---|---|
| Peeling or delamination | Dust/oil/moisture, or sealing over loose oxidized film | Remove loose areas, clean, spot recoat | Deep clean + degrease + don’t coat flaking layers |
| Streaks / lap marks | Stopping mid-pass, uneven thickness | Light recoat for uniformity | Maintain wet edge; use consistent passes |
| Tracking (tire marks) | Applied too thick or opened too early | Let it cure longer; sand lightly if tacky | Two thin coats; extend closure time |
| Rough texture / drag marks | Mix too thick or sand not blended | Screen/strain next batch; adjust per label | Mix thoroughly; keep agitation during application |
| Slippery surface | Too smooth, no traction sand where needed | Broadcast fine sand lightly (if compatible) | Use traction additive or sanded mix on slopes |
How Often Should You Reseal?
Most owners do best with a condition-based schedule:
- First seal: only after new asphalt has cured (many contractors recommend waiting months; longer in cooler or shaded areas).
- Reseal cycle: often every 2–4 years depending on traffic, climate, drainage, and snow/chemical exposure.
Practical reseal triggers (better than guessing dates)
- Surface looks gray and dry
- Fine raveling starts (you notice grit)
- Water no longer beads and soaks quickly
- Striping fades fast because the surface is wearing
Commercial tip: Align sealcoating with line-striping and targeted crack-repair. Bundling these into one planned maintenance cycle often reduces total downtime and cost.
Buying and Hiring: What Smart Buyers Ask For
If you’re hiring a contractor, ask these questions and listen for specific answers:
- How will you clean and dry the surface? (pressure wash + dry time plan)
- How will you handle oil spots? (degrease and/or primer strategy)
- What crack repair system will you use? (not “we’ll just seal over it”)
- Will you apply two coats? (and how long between coats)
- How will you control thickness and coverage? (measured coverage rates, not guesswork)
- What’s the closure time and how do you enforce it?
Red flag: “We can do it in an hour and you can drive tonight” on a large area. Fast jobs can be good—but only if prep, weather, and film thickness are truly controlled.
Conclusion
A well-applied emulsion sealcoat is one of the simplest ways to slow surface aging—but only when the pavement is a good candidate and the prep is done right. Use this Asphalt Emulsion Sealer Guide to choose a quality product, fix cracks and drainage first, apply two thin coats, and protect the surface until it fully cures.
Executive Summary Checklist (Print-and-Use)
Candidate check
- No base failures (no alligator cracking/soft spots)
- Drainage is acceptable (no ponding water)
- Surface is oxidized or lightly worn—not crumbling
Prep
- Edge weeds removed; loose debris cleared
- Surface power-swept/blown dust-free
- Oil spots degreased (or patched if severe)
- Cracks filled with proper crack sealant
- Potholes/failed areas patched and cured
Application
- Dry weather window secured
- Product mixed thoroughly; dilution per instructions
- Coat 1 applied thin and uniform
- Coat 1 fully dry before Coat 2
- Coat 2 applied thin (no puddles, no thick bands)
Cure & protection
- Foot traffic delayed until film is dry
- Vehicles kept off until fully hardened
- Sprinklers and water prevented during cure
FAQs
1) Does asphalt emulsion sealer waterproof asphalt?
It improves water resistance by filling surface texture and reducing permeability, but it won’t stop water entering through active cracks or structural failures. Treat cracks and drainage first for meaningful results.
2) How long should I wait before sealing new asphalt?
New asphalt needs time to cure and release oils. A conservative approach is to wait at least a few months, and longer if the surface stays soft, oily, or is shaded/cool—your contractor’s local experience matters.
3) Can I apply asphalt emulsion sealer over an old sealcoat?
Yes—if the old coating is sound and well-bonded. If it’s flaking, peeling, or chalky, remove loose material and clean thoroughly, or you’ll seal in failure and the new coat will peel too.
4) Why do professionals insist on two thin coats?
Thin coats dry evenly, bond better, and harden faster. A thick coat often cures slowly, stays tacky, tracks under tires, and can crack or peel as it shrinks.
5) Should I spray or squeegee?
Squeegees give excellent thickness control on smaller areas and reduce overspray. Spraying is faster and uniform for large lots—but only when the mix, wind, and technique are controlled and edging is handled cleanly.
Sources
- ASTM International defines performance requirements for asphalt emulsion pavement sealer used on driveways, parking areas, and roadways: ASTM D8099/D8099M
- The U.S. Whole Building Design Guide hosts official guide specifications covering emulsified seal coats, application-rate concepts, and field controls like test sections: UFGS 32 01 13.63 PDF
- A U.S. environmental fact sheet summarizes why certain sealcoat chemistries can raise PAH concerns in runoff and dust: EPA PAH & coal-tar sealcoat PDF
- A U.S. government science overview explains how coal-tar-based sealcoat can be a major PAH source in urban environments: USGS sealcoat & PAHs
- A federal manual compiles proven practices for crack sealing and filling—critical prep steps before any surface sealer: FHWA crack sealing manual PDF