
Proper Asphalt Installation starts with a stable, well-drained base, then uses the right mix thickness, correct paving temperature, and disciplined compaction. When each step is controlled—grading, base compaction, paving, rolling, and curing—you get a smooth surface that resists cracking, rutting, and water damage for years.
A “perfect” asphalt surface isn’t just about looking smooth on day one. It’s about carrying your real traffic (cars, delivery vans, forklifts) through heat, rain, and turning forces—without premature deformation.
This guide breaks the job into practical, checkable steps you can use whether you’re hiring a crew or supervising a project: driveway paving, parking lot paving, private roads, or industrial yards.
Highlights & Key Sections
What “Perfect Surface” Means in Practice
A high-quality asphalt surface should deliver:
Drainage that works: no standing water after normal rain
Stable edges: no crumbling where tires track near borders
Uniform texture: minimal segregation (no “rocky” or “oily” streaks)
No early rutting: especially at turns, entrances, and braking zones
Predictable maintenance: crack sealing and protection on schedule—not emergency repairs
Rule of thumb: most asphalt failures start below the asphalt layer—at the subgrade or base.
Asphalt Installation: Step-by-Step Workflow
Use this as your “job map.” Each step has a clear pass/fail outcome.
| Step | Goal | What “good” looks like | Biggest failure trigger |
|---|---|---|---|
| Site evaluation | Match design to traffic + soil | No soft areas; plan drainage paths | Ignoring weak subgrade |
| Grading | Move water away | Consistent slope; no low bowls | Flat spots/ponding |
| Subgrade prep | Create stable foundation | Firm, compacted, proof-rolled | Wet/unstable soils left in place |
| Base course | Load distribution | Correct thickness; tight compaction | Thin/loose base |
| Tack/prime (as needed) | Bond layers | Even coverage; no puddles | Skipping bonding coat |
| Paving | Place uniform mat | Consistent thickness; steady paver speed | Stop-start paving |
| Compaction | Lock density + strength | Tight mat; clean joints | Rolling too late/cold |
| Joints/edges | Prevent water entry | Sealed, tight joints | Open joints; weak edges |
| Curing/opening | Avoid scuffs + dents | Traffic allowed at safe cooling | Opening too early |
1) Site Evaluation and Pavement Design (Don’t Skip This)
Design depends on traffic load and soil behavior, not just area size.
A home driveway mainly sees passenger cars and occasional deliveries.
A parking lot sees turning, braking, and repeated wheel paths.
A warehouse yard sees concentrated loads and slow-turn shear forces.
Example: A small logistics entrance often fails sooner than the entire lot because trucks brake and turn there. If you only “match the rest of the lot” without reinforcing the entrance zone, rutting shows up first at the gate.
Quick decision questions
What’s the heaviest vehicle and how often does it pass?
Where do vehicles turn or brake hard?
Where does water naturally flow today?
2) Grading and Drainage: Build the Slope Before the Asphalt
Asphalt is water-resistant, not water-proof. Water that sits or seeps through cracks attacks the base.
Targets that usually work well:
Cross-slope around 2% (about 20 mm per meter) toward drainage
No depressions that hold water after rain
Mini tutorial: 5-minute slope check
Lay a straight board (or long screed) on the ground.
Use a level and measure the height difference at one end.
Aim for roughly 20 mm drop per 1 meter of run in drainage direction.
If the slope is wrong before paving, the asphalt crew can’t “roll it into shape” without creating thin spots.
3) Subgrade Preparation: Fix Soft Soil Now or Pay Later
This is where long life begins.
Practical steps:
Remove topsoil, organics, and unstable fill.
Proof-roll (or drive a loaded vehicle slowly) and mark pumping/soft areas.
If soil is weak or wet, use one of these:
Remove and replace with suitable fill
Stabilize with a compatible treatment (project-dependent)
Add reinforcement layer (geosynthetic) where needed
Hands-on insight: If you can leave a deep boot print in the subgrade, heavy tires will do much worse—especially after rain.
4) Base Course Installation: The “Hidden Structure” That Carries the Load
A well-graded aggregate base spreads load and protects the subgrade.
What to look for:
Correct thickness for your traffic category
Compaction in controlled layers (not one thick dump-and-roll)
No “springy” feel under equipment
Real-world check: Walk it. A properly compacted base feels hard and consistent—no soft edges, no loose stone pockets.
5) Edge Restraint: The Simple Detail That Prevents Edge Crumble
Edges fail first because they lose lateral support.
Common solutions:
Pave against existing curb/edge restraint
Build compacted shoulders
Widen the paved area slightly beyond wheel paths
Add structural edge support where traffic runs near borders
Example: Driveways with narrow paving and no shoulder often break at the sides when drivers cut corners or park partially off the pavement.
6) Bonding Between Layers: Make the Pavement Act as One
When you place asphalt over an existing asphalt layer or certain prepared surfaces, you typically need a bonding coat to prevent slippage and delamination.
A good application is:
Even and light—not flooded
Drying/tacking properly before paving
No tracked puddles
If layers don’t bond, you can get waves, shoving, or premature cracking.
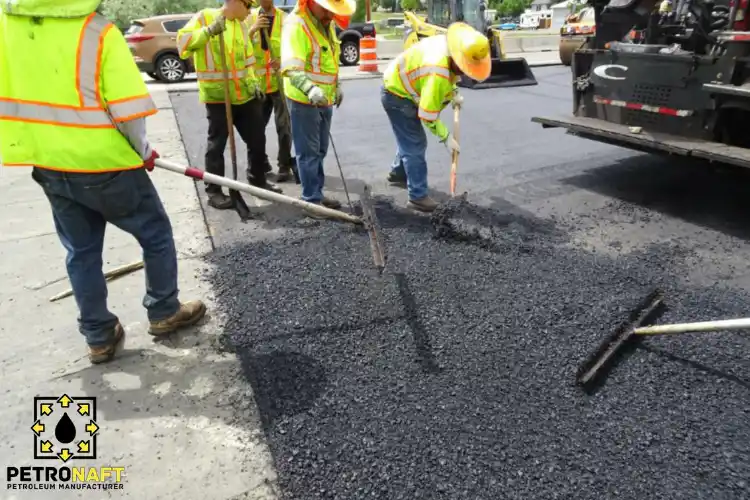
7) Paving: Consistency Beats Speed
A paver should place a uniform mat at a steady pace.
Best practices you can actually observe:
Truck handoffs are smooth (no long stops)
The mat thickness stays consistent across width
The crew manages edges cleanly, not by “raking forever”
Avoid the classic mistake: starting and stopping repeatedly creates temperature differences that show up later as density variation, segregation, and early distress.
8) Compaction: The Most Important 10 Minutes of the Whole Job
Compaction locks aggregate structure and reduces air voids—critical for strength and durability.
A disciplined rolling plan typically includes:
Breakdown rolling right behind the paver (while hot)
Intermediate rolling to build density
Finish rolling for smoothness and marks removal
Mini tutorial: how to spot “rolling too late”
If the roller leaves minimal effect and the surface looks brittle/crumbly at the edges, the mat is likely too cool.
Late rolling = low density = more water intrusion and faster cracking.
Practical cue: The crew should treat temperature like a countdown timer. Density becomes hard to achieve once the mat cools past the workable window.
9) Joints and Transitions: Where Water Loves to Enter
Longitudinal and transverse joints deserve extra attention.
What good joints look like:
Tight seam, not open gaps
Minimal height mismatch (“lips”)
Proper overlap/trim strategy, not sloppy handwork
Example: Many parking lots look fine in the center but fail along the lane seam where water and traffic combine.
10) Cooling, Curing, and Opening to Traffic
Asphalt cools gradually. Opening too early can create:
Tire scuffs and twists at turns
Indentations under parked vehicles
Marks from kickstands, jacks, or concentrated loads
Better approach:
Keep sharp turning and heavy loads off the surface until it cools fully.
For tight turns (driveway aprons, entrances), delay aggressive traffic as long as practical.
Thickness and Mix Selection Guide
Use this as a planning baseline. Local conditions and specs can adjust the final design.
| Application | Typical asphalt thickness | Typical base approach | Notes |
|---|---|---|---|
| Residential driveway | ~50–75 mm | Compacted aggregate base | Reinforce near garage and turning areas |
| Light commercial parking | ~75–125 mm | Thicker, well-compacted base | Focus on entrances and wheel paths |
| Heavy-duty / industrial | ~125–200+ mm (often layered) | Engineered base and/or reinforcement | Design for slow turns, braking, point loads |
Two smart upgrades buyers often choose
Thicker structure at entrances/ramps (the highest stress zones)
Better drainage and base compaction instead of “just more asphalt”
Quality Checks You Can Use On-Site (Even Without Lab Tools)
These checks catch most expensive mistakes early:
Drainage test: after a hose run, water should move away, not pool.
Thickness awareness: confirm planned thickness at edges and transitions.
Texture scan: look for streaks, rock pockets, or shiny binder-rich areas.
Straightedge check: a long straightedge reveals waves and dips quickly.
Edge integrity: edges should feel supported, not crumbling or fragile.
Quick acceptance habit: walk the entire surface and mark issues immediately—before equipment leaves. Fixing problems is easiest the same day.
Common Problems, Causes, and Fast Fixes
| Problem | Likely cause | What to do now | How to prevent next time |
|---|---|---|---|
| Rutting in wheel paths | Weak base/subgrade or low density | Mill/replace in zones if severe | Upgrade base + compaction discipline |
| Raveling (stone loss) | Low binder, poor compaction, aging | Surface treatment or thin overlay | Correct mix + density + timely protection |
| Alligator cracking | Structural failure below | Full-depth patch (not surface seal) | Improve subgrade/base design |
| Shoving/waves | Layer slippage or stop-start paving | Cut out and rebuild section | Ensure bonding + steady paving |
| Ponding | Bad grading | Regrade/overlay (case-dependent) | Build slope into base and binder course |
| Edge breakup | No lateral support | Rebuild edge + add support/shoulder | Add edge restraint and widen design |

Buyer’s Guide: How to Compare Contractor Quotes Like a Pro
When bids vary widely, it’s usually not “labor cost.” It’s scope clarity.
Ask for these items in writing:
-
Proposed thickness (asphalt + base) by area
-
What they will do with soft spots and unstable soil
-
Compaction approach (roller type, rolling sequence)
-
Drainage plan: slopes, tie-ins, and water exit points
-
Joint strategy and edge support details
-
Cleanup, haul-away, and traffic control
Bid comparison table (copy/paste into your notes)
| Item | Bid A | Bid B | Bid C |
|---|---|---|---|
| Asphalt thickness (mm) | |||
| Base thickness/type | |||
| Soft subgrade plan | |||
| Drainage & grading scope | |||
| Joint/edge details | |||
| Warranty scope |
Red flag: a quote that’s “all-in” with no thickness, no base detail, and no drainage plan. That’s where surprises—and failures—live.
Maintenance Plan for a Longer-Lasting Surface
A little maintenance beats a big repair bill.
First 30–90 days
-
Keep heavy loads and sharp turns minimal if possible.
-
Avoid parking in the same spot every day (reduces early indentation).
-
Keep the surface clean to prevent staining and binder softening.
Ongoing (seasonal habits)
-
Sweep debris and keep drainage points open.
-
Seal cracks early before water reaches the base.
-
Protect the surface on a schedule appropriate to your climate and traffic.
Practical note: Sealants and protective treatments work best on a clean, dry surface—rushing them on a damp pavement wastes money.
Trends and Innovations Affecting Asphalt Projects
A few industry shifts are improving results when applied correctly:
-
Warm-mix techniques help crews work with better temperature control and can reduce fumes and energy use, especially useful in cooler seasons or long haul distances.
-
Higher recycled content mixes can lower cost and footprint, but they demand tighter quality control and smart binder management to avoid brittleness.
-
Smarter compaction monitoring is reducing “looks good, fails early” jobs by making density consistency easier to achieve.
If you’re buying a project, the takeaway is simple: ask how the contractor manages temperature, density, and variability—not just how fast they can pave.
Final Checklist and Executive Summary
When you control drainage, base strength, temperature, and compaction, Asphalt Installation becomes predictable—smooth now, durable later.
Pre-job
-
Confirm traffic category (cars vs trucks vs industrial)
-
Verify drainage plan and target slopes
-
Identify soft areas and define the fix method
-
Lock thickness and base scope in writing
During paving
-
Base is firm and uniformly compacted
-
Paver runs steadily; mat looks consistent
-
Rolling starts early and follows a clear sequence
-
Joints are tight and edges are supported
After paving
-
No ponding zones; transitions are smooth
-
Limit sharp turns/heavy loads until fully cooled
-
Plan crack control and protection on a schedule
FAQ
1) How long does new asphalt need before cars can drive on it?
Many surfaces can handle light vehicle traffic after cooling, but sharp turns and heavy loads can still scuff or dent early. It’s safer to minimize aggressive turning for the first day and avoid concentrated loads until fully cooled.
2) What matters more: thicker asphalt or a better base?
For most failures, the base and subgrade decide lifespan. Extra thickness helps, but a weak or wet foundation will still rut and crack. If budget forces a choice, strengthen drainage and base compaction first.
3) Can asphalt be installed in cold or rainy weather?
Moisture and low temperatures shrink the workable window for placement and compaction. Crews can succeed in cooler conditions with tighter logistics and temperature control, but paving on wet surfaces is a common cause of bonding and density problems.
4) Why do ruts appear at entrances and tight turns first?
Braking and turning create high shear forces that push the mat sideways, especially if density is low or the base is weak. Reinforcing these zones with better structure and disciplined compaction prevents early deformation.
5) When should I seal cracks or apply protective treatments?
Seal cracks as soon as they appear and before water reaches the base. Protective surface treatments work best after the surface has stabilized and is clean and dry; timing depends on climate, traffic, and the product used.
Sources
-
Practical guidance on pavement design, mix behavior, and construction quality from the industry’s core training body: Asphalt Institute
-
Roadway construction and asphalt technology resources with research-backed implementation guidance: Federal Highway Administration
-
Widely used transportation specifications and methods that shape how pavement work is measured and accepted: AASHTO
-
Industry data, best practices, and performance-focused resources for asphalt pavements: National Asphalt Pavement Association
-
Standardized test methods and material specifications commonly used in paving quality control: ASTM International